
How To Bleed Motorcycle Brakes From Empty – Easy Steps
Use the brake fluid your manual specifies. Fill the master cylinder to MAX, and keep it topped up.
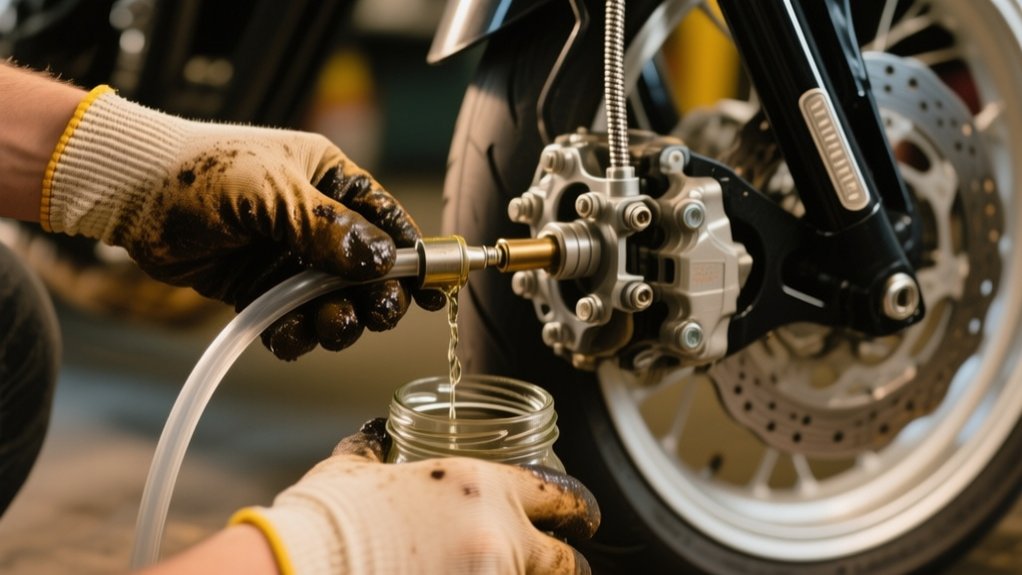
Fit clear tubing to the farthest caliper’s bleeder. Submerge the tube in fresh fluid, then open the screw half a turn.
Pump the lever slowly until fluid flows. Close the bleeder before releasing the lever.
Repeat at each caliper until the stream stays clear and bubble-free. Check lever feel and leaks, and you’ll pick up the finer tricks next.
Tools and Fluid You’ll Need
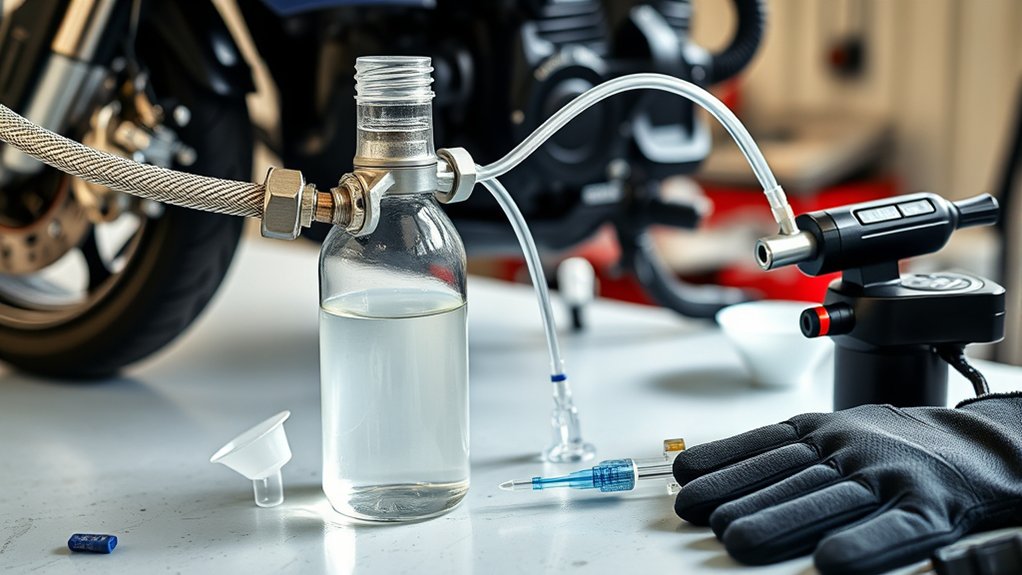
Before you start bleeding the brakes, gather the right fluid and tools. This helps you avoid contaminating the system and wasting time mid-job.
Use only the brake fluid type your owner’s manual specifies, such as DOT 3, DOT 4, or DOT 5.1. Open a fresh brake fluid bottle only when you’re ready. Don’t mix fluid types.
Use only the brake fluid type your owner’s manual specifies, and open a fresh bottle only when you’re ready.
Have a vacuum or hand-held bleeder kit with clear tubing and the correct adapter for your bleeder nipple. This lets you spot air bubbles and speeds up the job.
Keep an open-end wrench sized to the bleeder screw. Have spare copper crush washers or stainless replacements for line fittings.
Also prepare brake cleaner, clean rags, and a cardboard drip tray. Spilled fluid can damage paint.
Use a small clear jar with tubing and fluid, or a helper, to limit air reentry.
Set Up the Reservoir and Catch Jar
Fill the master cylinder reservoir with the brake fluid specified in your owner’s manual.
Bring it up to the MAX line so you don’t pull air into the system.
Set a clean catch jar beside the wheel.
Run clear tubing tightly over the bleed nipple, and submerge the hose end in the jar.
If you’re using a vacuum bleed kit, connect its hose to the nipple.
Also, make sure the kit’s reservoir has fresh brake fluid.
Lay cardboard under the bike.
Wrap nearby paint and parts with rags or tape to catch any spills.
Keep the cap loosely fitted, or retain the diaphragm if your manual calls for it.
Monitor the reservoir continuously.
Top it up with fresh fluid as needed.
Keep the reservoir at the MAX mark with fresh brake fluid.
Prime the Master Cylinder
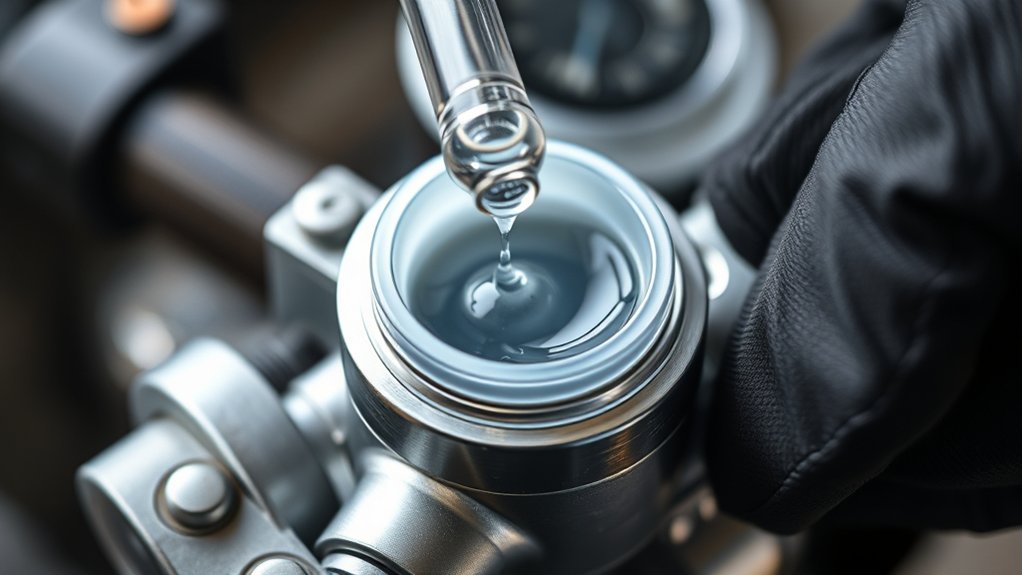
Fill the master cylinder reservoir up to the MAX line with the specified brake fluid. Then loosely reinstall the cap or follow the OEM seal procedure so you don’t accidentally pull air into the system.
Next, pump the brake lever slowly and firmly several times. After a few strokes, you should feel resistance—this means fluid is moving into the lines.
If the lever still feels spongy or bottoms out, keep topping up the reservoir and repeat controlled strokes until the fluid runs clear and the lever firms up.
Master Cylinder Prep
Prime the master cylinder.
Confirm the reservoir is filled to the correct DOT-rated brake fluid and held at the MAX line, so you don’t draw air into the system.
If it’s empty, add fresh fluid with a syringe or turkey baster.
Fill until the chamber and visible passages are full and free of air coming through the inlet.
Fit the cap loosely or install the diaphragm.
Then gently pull the brake lever and watch for a firm return.
Keep the fluid level topped while you work, but don’t overfill.
When you open a bleed nipple, stop and cap the reservoir to prevent fluid squirt and contamination.
If the lever still feels spongy, remove the cover.
Prime again with clear tubing submerged in fluid until no bubbles escape from the master’s passages.
Pumping Technique
With the reservoir cap secured but still accessible, slowly pull the brake lever all the way through 5–10 full strokes. Watch for fresh fluid to enter the master cylinder and seat the piston.
Keep the motion deliberate. You’re moving old fluid toward the outlet and replacing empty space with brake fluid.
After the first few strokes, use firmer, controlled squeezes. Avoid pumping rapidly.
Never let the brake lever hit the bar. If it does, you may pull the piston past its normal travel and draw air back in.
If the master cylinder’s empty, open the bleed nipple. Make single full draws, then close it before you release.
Keep the reservoir topped off with the correct DOT fluid. When the lever turns short and firm, or fresh fluid appears, the master’s primed.
Bleed the Farthest Motorcycle Caliper First
Start by bleeding the caliper farthest from the master cylinder. Because its longer hydraulic line is most likely to trap air, this is the one you want to clear first.
Fill the reservoir up to the max mark, then attach clear tubing to the bleeder nipple and submerge the tube end in fresh fluid so you can actually see air bubbles escaping.
Next, open the bleeder about a half-turn. Then pump or vacuum-bleed until you get a steady stream of only clear fluid.
Tighten the bleeder while there’s still pressure, and then move on to the next-farthest caliper.
Farthest Caliper First
Begin at the caliper farthest from the master cylinder—usually the rear brake or the opposite-side front caliper. This is because air and fluid will be pushed toward the master as you bleed the system.
Fill the reservoir to the max line. Seat the cap loosely, then open that caliper’s bleed nipple about half a turn.
Fit clear tubing to the nipple and route it into a jar of fresh brake fluid. This helps prevent drawing air back in.
Squeeze the lever slowly while you keep the reservoir topped up. Close the nipple before you release the lever.
Repeat until the fluid runs clear and bubble-free. Once that line is clean, move to the next caliper closer to the master cylinder and repeat.
Confirm a firm lever before tightening everything.
Sequence By Distance
Once you’ve set up the line at the farthest caliper, work by distance from the master cylinder. Identify the most distant caliper first, and fill the reservoir to the max line.
Bleed that caliper until the fluid runs clear and bubble-free. Attach clear tubing to the bleed nipple, and route it into a catch jar so you can watch bubbles leave the brake lines.
Pump the lever slowly, or use vacuum bleeding. Keep the reservoir topped up at all times so you don’t draw air back into the system.
Move next to the next-closest caliper, then repeat the same process in sequence. Keep going until you finish at the nearest caliper.
Confirm firm lever feel, tighten each bleed screw, and recheck fluid level and leaks.
Time the Lever and Bleeder Correctly

Time the lever and bleeder correctly so you move fluid without pulling air back into the system.
Squeeze the lever fully, open the bleeder about half a turn, then close it before you release the lever.
Time your lever strokes precisely to keep pressure moving in one direction.
- Keep the lever moving smoothly.
- Open the bleeder only while the lever’s fully in.
- Close it before the lever returns.
- Use short bleed windows.
- Repeat the cycle until fluid flows cleanly.
If you’re vacuum bleeding, start suction first and keep it on until the bleeder is shut.
If the system was empty, pump slowly and stop short of the grip so the master cylinder can draw fluid and rebuild pressure.
Open the bleeder only near full lever travel, then seal it promptly.
Keep the Reservoir Topped Off
Keep the master cylinder reservoir topped off at or below the MAX line with the exact brake fluid specified in your owner’s manual. This helps prevent air from getting into the system.
Keep the master cylinder reservoir topped off at or below the MAX line to prevent air from entering the system.
Check the level before every stroke and during each bleed cycle. Refill it before it reaches the minimum mark or exposes the pickup.
If you’re using a vacuum bleeder or a one-man kit, watch the reservoir closely. Top it up every 30–60 seconds, or sooner if the level drops visibly, so the pump never ingests air.
Use fresh fluid that has settled, ideally from an opened container left overnight. Keep the cap loosely installed, or leave the diaphragm in place, so you can monitor the level quickly while limiting splash and contamination.
Watch for Clear, Bubble-Free Fluid
Watch the fluid coming out of the bleed nipple until it runs clear and stays bubble-free for at least two consecutive pump cycles.
Use a clear hose submerged in fresh brake fluid so you can easily see whether the line is carrying air.
If you still see bubbles, keep the reservoir topped up and continue bleeding until the flow is clean.
Clear Fluid Signs
Clear, bubble-free fluid at the bleed nipple tells you the air is gone and fresh brake fluid is reaching that circuit. The color should shift to pale straw or nearly clear, not brown or black.
Watch the stream in a clear container:
- keep the hose submerged
- bleed until it runs clear
- stop after several bubble-free strokes
- move to the furthest outlet first
- recheck the reservoir
If one caliper clears but the master cylinder still shows dark fluid, keep bleeding the remaining outlets in sequence.
During vacuum bleeding, hold suction until clear fluid flows. Then close the bleeder while vacuum stays applied.
Afterward, pump the lever or pedal several times. Inspect the bleed nipple and reservoir again for clear fluid.
Bubble-Free Bleed Check
Open the bleed nipple about half a turn. Cycle the lever or pedal slowly and fully while you feed fresh fluid through the system.
Keep the reservoir at the max line. Check it every one to two strokes so you don’t pull air back in.
Fit clear tubing to the bleeder. Route the tubing into a transparent jar.
Use clean, light-colored fluid with no bubbles or foam. Start at the caliper farthest from the master cylinder, then work closer.
Close the nipple before you release the lever or pedal each time. If you use a vacuum pump, keep drawing until several reservoir top-ups still produce bubble-free fluid and the lever feels firm.
Fix Air Pockets That Won’t Bleed Out
If the brakes still feel spongy, you’ll need to hunt down the trapped air and let it rise to the bleed point.
Position the caliper so the bleed nipple sits highest. Rotate or remove it if needed.
Slip clear plastic tubing onto the nipple and submerge the free end in a jar of brake fluid.
Pump and hold, or apply steady vacuum.
Watch for micro-bubbles in the hose.
Gently compress multi-chamber pistons if air lingers.
Tilt or rotate the caliper to free hidden pockets.
Eliminate hose loops, then syringe fluid from caliper to master if needed.
Keep the reservoir topped up throughout.
If bubbles persist, repeat targeted bleeding on that circuit until the fluid runs clean and air-free.
Check Lever Feel and Brake Response
Check the lever feel now that the system’s bled. With the master cylinder empty, expect long, spongy travel at first.
After about 5–10 full bleed cycles per caliper, you should notice a clear improvement as fresh fluid reaches the pistons.
You should end up with about 1/2–3/4 inch of free play before firm resistance in the brake system. If the lever still travels too far, feels soft, or sinks under pressure, air remains or a seal is leaking.
Keep the reservoir above the internal port while you evaluate feel, or you’ll draw air back in. If you’re unsure where the fault sits, block the master-cylinder port with a finger. If the lever still gets pressure, the master is working and the issue is downstream.
After adjustment, verify consistent response with several firm squeezes.
Tighten Fittings and Test for Leaks
Once the lever feels firm, tighten the banjo bolts. Then tighten the bleed nipple fittings to the manufacturer’s torque specification. This is typically 20–33 Nm (14–24 lbf·ft), so the joints seal without distorting the threads.
Inspect the brake line, copper washers, and hose ends closely before your test ride. Wipe every fitting dry. Pump the lever hard.
Hold pressure for 10–15 seconds. Look for fresh wetness. Recheck the reservoir cap.
If you spot seepage, don’t ride. Re-torque the fittings. Replace cracked hose ends, damaged washers, or faulty bolts, then bleed again until everything stays bone-dry.
Afterward, make a slow, low-speed stop in a safe area. Immediately inspect each joint for weeping.
Frequently Asked Questions
How Long Should a Completely Empty Brake System Take to Bleed?
A completely empty brake system usually takes you 15–45 minutes to bleed by hand.
If you use a vacuum pump or pressure bleeder, you can often finish in 10–20 minutes.
You’ll need 20–50 lever or pedal strokes per caliper, and you must keep the reservoir full.
If you still don’t get firm pressure after an hour, stop and check for trapped air, leaks, or a faulty master cylinder.
Can I Bleed Motorcycle Brakes Alone Without a Helper?
Yes, you can bleed motorcycle brakes alone with a vacuum pump, one-way bleeder, or bottle-and-tubing setup. Keep the reservoir topped up with the correct brake fluid.
Open the bleed screw and draw fluid until the bubbles stop. Start at the caliper farthest from the master cylinder, then work inward.
Tighten each screw while applying vacuum. Check for leaks, and confirm a firm lever before riding.
What Happens if the Reservoir Runs Dry During Bleeding?
If the reservoir runs dry, you’ll pull air into the master cylinder and hydraulic lines.
Your lever or pedal will go soft.
You can’t just keep pumping.
Refill it immediately with the correct brake fluid, then bleed again, starting with the caliper farthest from the master cylinder.
Inspect for debris.
If needed, flush old fluid before continuing.
How Do I Know if the Master Cylinder Is Fully Primed?
You know the master cylinder’s fully primed when the lever feels firm, not mushy.
It should stop short of the grip under steady pressure.
Watch the reservoir closely as you pump.
The fluid should stay near max, without foaming or dropping each stroke.
Open the bleeder and you should see a steady stream.
It should be bubble-free.
Hold pressure for 10–15 seconds.
If the lever doesn’t creep, you’ve got a sealed, primed system.
Should I Replace Old Brake Fluid Before Bleeding the System?
Yes, you should replace old brake fluid before bleeding the system.
It helps you get better braking and reduces moisture-related fade, since brake fluid absorbs water over time.
Use the exact fluid your owner’s manual specifies.
Also, don’t mix incompatible types.
Start with a fresh, sealed bottle.
Then bleed until the old fluid runs clear.
Keep the reservoir topped up.
This prevents you from pulling air back into the system.
Conclusion
Now that you’ve bled your motorcycle brakes from empty, you should have a firm lever and consistent stopping power.
Brake systems can contain over 100 individual bubbles after a complete drain, so patience matters.
Recheck every fitting for leaks, then top off the reservoir to the correct level.
Test the lever again before you ride, and if it feels spongy, bleed it once more.
A solid brake system isn’t optional.
It’s what keeps you safe.