
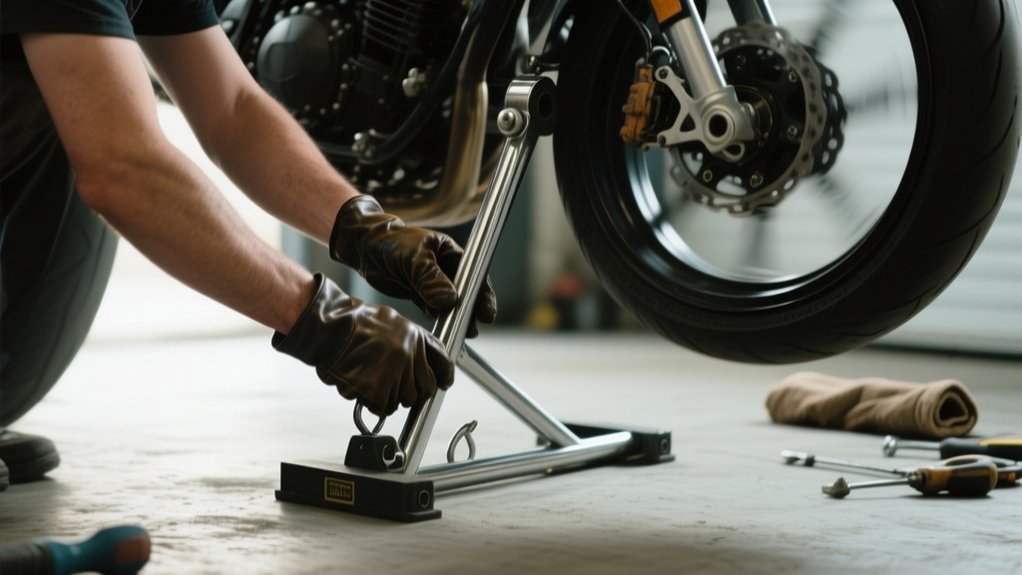
How To Use A Motorcycle Stand – Full Tutorial
Match the stand to your bike first. Use a rear paddock stand for twin-sided swingarms, or an axle/single-sided adapter for hollow rear axles.
For front-end work, use a spindle or steering-head stand. Then place the bike on firm, level ground.
Check fitment and fully seat the adapters. Lift the bike in small increments, and lock the stand in place.
For extra stability, add straps or a chock before you remove wheels, forks, or swingarms. The details make setup safer and faster.
Choose the Right Motorcycle Stand

Start by matching the stand to your bike and the job you need to do. For most home maintenance, a rear paddock stand is the most economical choice if your bike has a standard twin-sided swingarm with bobbin threads.
Check the bobbin thread size before you order to make sure the stand fits securely. If you run a single-sided swingarm or hollow rear axle, use a swingarm-axle or single-sided adapter stand that matches the axle diameter and hollow-axle spec.
When you need to remove swingarms or forks, choose a central stand or scissor/jack table. For frequent tire changes, buy a premium paddock stand or lift table rated above your bike’s wet weight.
Make sure it includes mechanical locks and front-lift compatibility.
Set Up on Level Ground
Set the motorcycle on a firm, level surface—ideally concrete—and make sure it can’t roll. Keep it in gear or use the parking brake to hold it steady.
Clear at least three feet around the bike, and remove any debris or fluid that could make the stand slip. Then confirm the stand fits the bike’s specified contact points, and check that its feet sit flat and fully support the load.
Choose Level Surface
Choose a firm, level surface before you place the motorcycle stand. Use a concrete floor or a sealed garage floor. Avoid sloped driveways, gravel, and soft ground that can let the stand sink or tip.
Confirm the area is within a few degrees of level using a spirit level. You can also compare nearby walls and cabinets for squareness.
A level base keeps the bike stable at its working height. It also reduces side loading on the stand.
If you’re using a hydraulic lift table or scissor jack, lower it fully. Then lock the safety latch before rolling the bike on.
On slightly uneven floors, shim the stand’s feet with steel or hardwood. This helps spread the load safely.
Never use unstable supports.
Clear The Work Area
With the bike on firm, level, smooth ground, clear a wide work zone before you bring in the stand. Remove tools, hoses, loose parts, and debris from at least a 3-foot radius. This lets you move freely and place the stand without snagging anything.
Use wheel chocks if the bike needs extra restraint while you set up. Check overhead and front clearance too. You need room for the stand’s handle and, if required, space to remove wheels or fork legs.
Roll the bike into position only after you confirm the jacking point lines up with the stand’s contact points. Look for brake lines, license plate brackets, and low exhausts or fairings. These can block the stand or get crushed when you raise it.
Check Stand Fit
Now that the work area is clear, park the motorcycle on firm, level ground. Confirm you have at least three feet of open space around the stand.
Check that the stand matches your bike. Look for rear bobbins, a hollow axle adapter for a single-sided swingarm, or front feet and pin mounts that locate on the fork legs.
Inspect both the stand and bike contact points. Check for cracks, bent parts, or worn threads. Verify the bobbin size or axle diameter.
Fit rubber pads or bobbins if required to protect paint. Set the stand so both feet sit flat. Make sure nothing touches brake lines, plates, or fairings.
With a helper steadying the bike, lift only a few inches. Confirm balance, then lower and recheck the connection before raising it fully.
Check Fitment Before You Lift
Before you lift, take a quick moment to confirm the stand actually matches your bike’s hardware. Rear paddock stands should have the right bobbin threads or a flat swingarm lip, single-sided stands need the correct hollow-axle adapter, and front stands require the proper steering-head or fork-foot fitment.
Next, double-check the thread size and adapter spec, and inspect the condition of the jacking points. Also make sure the swingarm, axle, or frame isn’t damaged or distorted.
Before you commit to lifting, confirm you’ve got enough clearance around the exhaust, plates, brake lines, and fairings. You want the stand to sit squarely without crushing, pinching, or scratching anything—then do a quick test-fit on the ground first.
Stand Compatibility Check
Check fitment first so the stand matches your bike’s hardware and lifting points.
Verify the stand style before you lift the bike.
Rear paddock stands need swingarm bobbin threads or matching spools.
Single-sided swingarms need a hollow axle and the correct adapter.
Front or head stands need a hollow steering head or fork feet that fit the pins.
Measure thread size or axle diameter, then confirm the manufacturer’s adapter part number before ordering.
That helps prevent sloppy engagement, paint damage, or bent hardware.
Also make sure the lift point is rated for the job.
A rear stand supports the wheel, while a frame jack may let you remove a swingarm or shock if the frame has suitable lower tubes.
Surface And Clearance
Set the bike on firm, level, smooth ground—concrete is best—and avoid slopes, soft surfaces, or uneven paving that can let the stand or machine tip.
Before you lift, make sure you’ve got room and fitment.
- Keep at least three feet of clear space around the bike.
- Leave an open path for the stand or ramp, with no tools, cords, or clutter.
- Confirm the stand matches your jacking points and that any adapter or bobbin thread size fits.
- Check that exhausts, fairings, skid plates, brake lines, and plates won’t block, pinch, or rub.
If you’re using a front or rear paddock stand, make sure there’s enough wheel clearance to seat the headpiece cleanly.
When you’re working alone, a front wheel chock can add stability and help prevent unexpected movement.
Fit the Rear Stand to the Swingarm
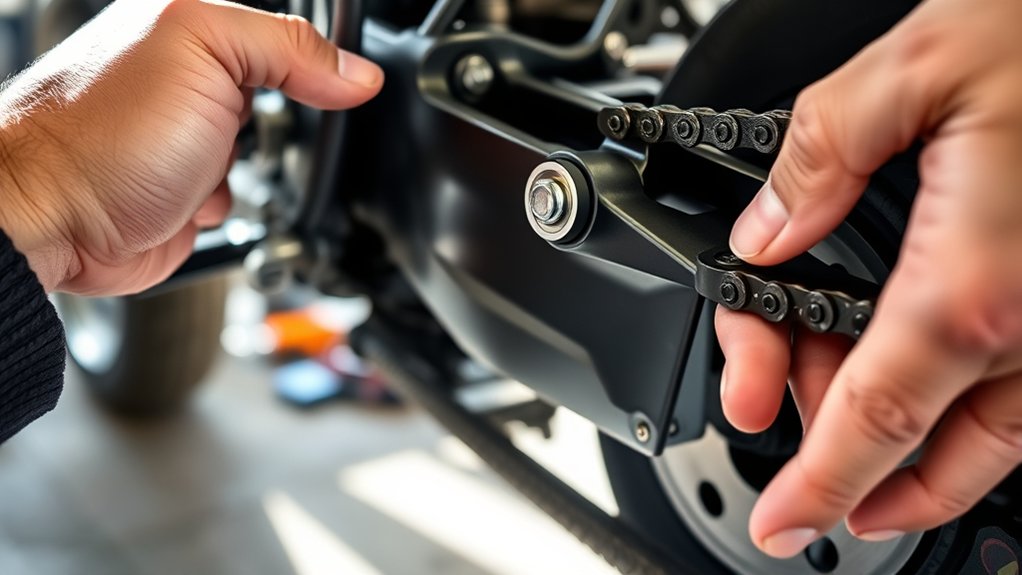
Roll the rear paddock stand into position.
Make sure the hooks or spool adapters sit squarely under the swingarm bobbins.
Make sure the hooks or spool adapters sit squarely under the swingarm bobbins.
Before you fit it, verify your bike has the correct bobbin threads or dedicated spools.
If your bike uses a hollow axle or single-sided arm, install the manufacturer-approved adapter into the axle instead of using bobbin hooks.
Align the stand vertically, not at an angle.
This helps you avoid prying sideways on the swingarm or scratching paint.
Pump the handle steadily.
Stop when the bobbins or adapter carry the load and the rear wheel just clears the ground.
Check that brake lines, the license plate, and bodywork stay clear.
Then confirm both contact points feel tight on a firm, level surface before you work.
Lift the Front Wheel Safely
With the rear stand already supporting the bike, place it on a firm, level surface. Then center it before you lift the front wheel. Choose the right front-lift method for your bike, and work slowly while keeping your hands clear.
- Match the stand or adapter to your steering head or fork feet.
- Seat the adapter or pins fully before you apply lift.
- Raise the front wheel in small increments. Stop to check balance.
- Lock the stand, then add tie-downs or a chock if needed.
If you use a spindle-style setup, feed the adapter from below and turn it carefully. If you use fork-foot supports, watch the brake line and fairing for pinch points.
Once the front wheel clears the ground, secure the bike so hydraulic pressure isn’t your only support.
Use a Headlift or Spindle Stand

A headlift or spindle stand works only if your bike has a hollow steering head or an accessible lower handlebar tube. Confirm the fit, and order the correct vehicle-specific adapter before you start.
Position the spindle stand under the steering head, or feed the spindle through the hollow tube. Make sure the adapter seats fully.
Raise the threaded spindle or crank slowly until it bears evenly on the head. Lift in small increments, and pause every few inches to check centering and clearances around fairings, cables, and fork legs.
At the target height, engage the mechanical lock. Then use a rear paddock stand or tie-downs for extra support.
This method is one of the best for front-end service when you follow torque and clearance limits.
Secure the Motorcycle Before Working
Before you work, park the bike on a firm, level surface. Select first gear or apply the parking brake. If needed, use a wheel chock to prevent rolling.
Center the motorcycle on the stand pads. Make sure the load sits evenly front to rear. Then secure it before you touch tools.
- Fit at least four tie-down straps, two front and two rear.
- Tighten them evenly to the table or frame.
Engage the mechanical lock at working height. Don’t rely on hydraulic pressure alone. Recheck strap tension every 15–20 minutes during long jobs.
Add a frame jack or front support if stability needs help. Keep your hands and feet clear while lifting or lowering. A stable setup prevents tip-over and keeps the bike predictable under load.
Remove Wheels, Forks, or Swingarms
Choose a stand that matches the bike’s jacking points, then lock it off and make sure it’s stable before you remove anything.
For front-end work, raise the bike with a spindle or steering-head stand so the wheel hangs free, and then support the fork legs before you loosen the axle and pinch bolts.
For swingarm or rear wheel access, use the correct rear paddock or hollow-axle adapter, lift until the wheel clears, and remove the axle and any related components as needed.
Front End Removal
When you need to remove the front end, support the bike with the correct stand and adapter. Use a front-head or spindle stand with a vehicle-specific insert to lift the front end securely for wheel or fork removal. Or use a swingarm adapter on a central stand for single-sided or front swingarm work.
For front removal, keep the chassis stable and follow these steps.
- Fit the stand and lock it.
- Add chocks or straps if needed.
- Loosen the axle pinch bolts first.
- Lower parts only after support is in place.
For fork removal, raise the bike, remove the wheel, and undo the axle. Then release the triple clamps and slide the legs out.
Don’t rush; a firm setup prevents tipping and protects components during front removal.
Swingarm And Wheel Access
For wheel, fork, or swingarm work, match the stand to the chassis and axle type.
Use a rear paddock stand on swingarm bobbins to lift the rear wheel clear for chain service or wheel removal.
Confirm the bobbin thread size first.
That setup won’t support single-sided or triangular Softail swingarms.
For a single-sided arm or a hollow axle, fit a swingarm-axle stand with the correct diameter adapter.
This lets you remove the wheel and shock absorber safely.
If you need front wheel or fork access, use a front head/spindle stand or wheel rocker.
Make sure you use vehicle-specific adapters for the setup.
For full swingarm removal, use a central scissor or hydraulic lift under stable lower frame tubes.
Strap the bike, lock the lift, and work on firm, level ground so it won’t shift one side.
Fix Common Stand Fitment Problems
If your stand doesn’t line up cleanly, start with the bike-and-stand match. Rear paddock stands usually need bobbin threads or a flat swingarm lip. Single-sided swingarms need a hollow axle with the right adapter diameter.
Central or underframe stands need firm lower frame tubes or a flat sump surface. Before you remove the wheel, measure the bobbin or axle bore. M8, M10, and 12–20 mm fitments vary by model.
- Confirm adapter size before you order.
- Clear license plates, brake lines, or exhaust parts.
- Fit protective bobbin pads to avoid paint damage.
- Check front-lift clearance and spindle adapters for fork feet.
Seat the socket fully, then tighten the engagement so the stand sits squarely. If it still won’t align, recheck clearance and geometry.
Handle a Motorcycle Stand Safely
Always set the bike on firm, level ground. Have a helper steady it while you position and engage the stand.
Before lifting, inspect the contact points. Check bobbins, swingarm, fork feet, spindle, or axle adapters for proper fit and damage.
A wrong adapter or a pinched brake line can destabilize the bike. If anything looks off, fix it before you raise the motorcycle.
Raise it slowly and evenly. Keep your hands clear of pinch points as you go.
Pause every few inches to confirm the stand’s seating. Also check the bike’s centerline stays aligned.
Once it’s up, lock the stand’s safety latch. Alternatively, add a wheel chock and use two tie-down straps, front and rear, tightened evenly.
DIY mechanics shouldn’t rely on a single stand for long jobs. Combine supports, and never stand under the motorcycle while it’s elevated.
Frequently Asked Questions
How Do I Store a Motorcycle on a Stand Long-Term?
Use a stand that supports the swingarm or forks, not the bodywork. Then park the bike on a firm, level surface.
Lock the stand mechanically and unload both wheels to stop flat-spotting. Keep tyre pressure up and top off fluids. If possible, disconnect the battery or use a tender.
Cover the bike to protect it from dust and moisture. Every 4–8 weeks, rotate the wheels and inspect straps, locks, and corrosion. This helps you avoid storing damage.
Can One Stand Fit Multiple Motorcycle Models?
Yes, one stand can fit multiple motorcycle models, but you’ve got to match it to the mounting points.
Universal rear paddock stands often work across sport and naked bikes if you use the right bobbin or fork adapters.
Don’t mix and match blindly. Measure axle diameter, thread pitch, or steering-head bore, and confirm the stand’s weight rating exceeds your bike’s wet weight.
Always verify fitment before you buy.
How Often Should I Inspect My Motorcycle Stand?
Inspect your motorcycle stand before every use. Also do a deeper check weekly if you use it often.
Look at welds, hooks, bobbin threads, fasteners, locks, and any bending or looseness. If you use a hydraulic lift table, inspect it weekly and after any odd noises or movement.
Check straps, chocks, and pads monthly. Perform a full safety inspection annually, or before heavy maintenance jobs.
What Accessories Improve Stand Stability and Safety?
Four quality ratchet or cam-buckle straps, a front-wheel chock, and non-marring bobbin adapters improve stand stability and safety.
For example, if you’re lifting a sport bike in a garage, a chock stops side-to-side creep while straps hold the bike upright.
You should also use axle protectors, engage the lift’s mechanical lock, and add a frame scissor jack for extra clearance.
Work on level ground and recheck tension often.
Can I Use a Stand on Uneven Garage Floors?
Yes, you can, but only if you make the surface stable first.
Use a firm, level base, preferably concrete.
Add a solid plywood pad or a purpose-made baseplate to bridge minor irregularities.
If the floor slopes, chock the wheels and use tie-down straps.
On uneven spots, shim the stand feet.
Then rock the bike gently to confirm it won’t shift before you work.
Conclusion
Using a motorcycle stand correctly makes maintenance safer and faster.
Pick the right stand, and confirm fitment.
Work on level ground so the bike stays steady.
Set the rear and front stands properly.
Secure the motorcycle before removing wheels, forks, or swingarms.
If fitment feels off, stop and correct it.
Treat the stand like your bike’s anchor.
One mistake can tip the whole job.
Stay methodical, stay safe, and you’ll work with confidence.