How To Plug A Motorcycle Tire – Pro Tips
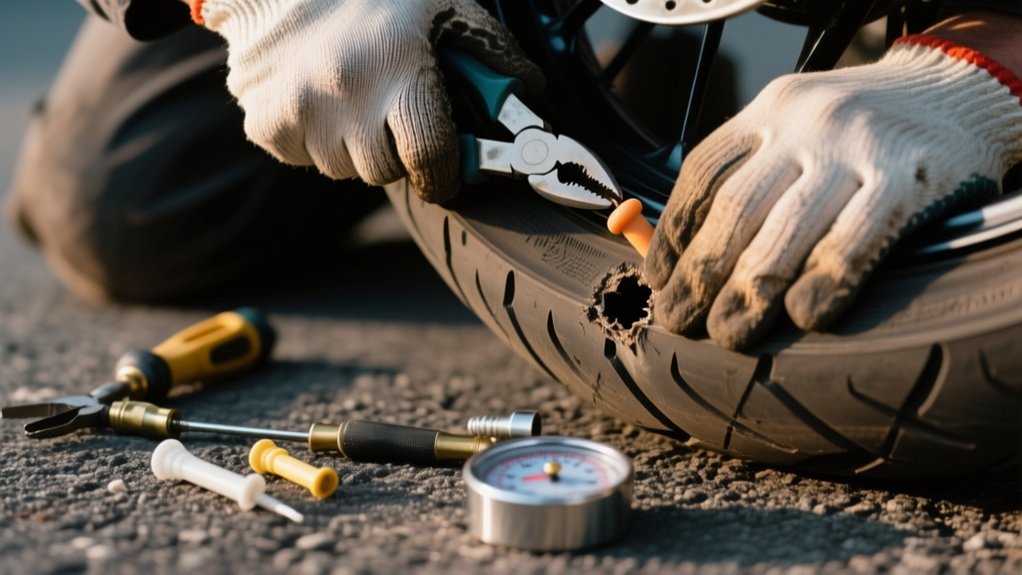
Use a motorcycle plug kit with rubber plugs, a T-rasp, inserter, sealant, pliers, and a 12V compressor. First, confirm the leak is in the tread, not the sidewall. Also, make sure it’s a small puncture.
Remove the nail straight out, then ream the hole. Coat the plug, insert it using the inserter, and pull the tool out. Trim the plug slightly proud of the tread.
Inflate the tire to the correct spec, then check for bubbles. Treat the repair as temporary until a shop inspects it inside and out.
Tire Plug Kit Tools and Supplies
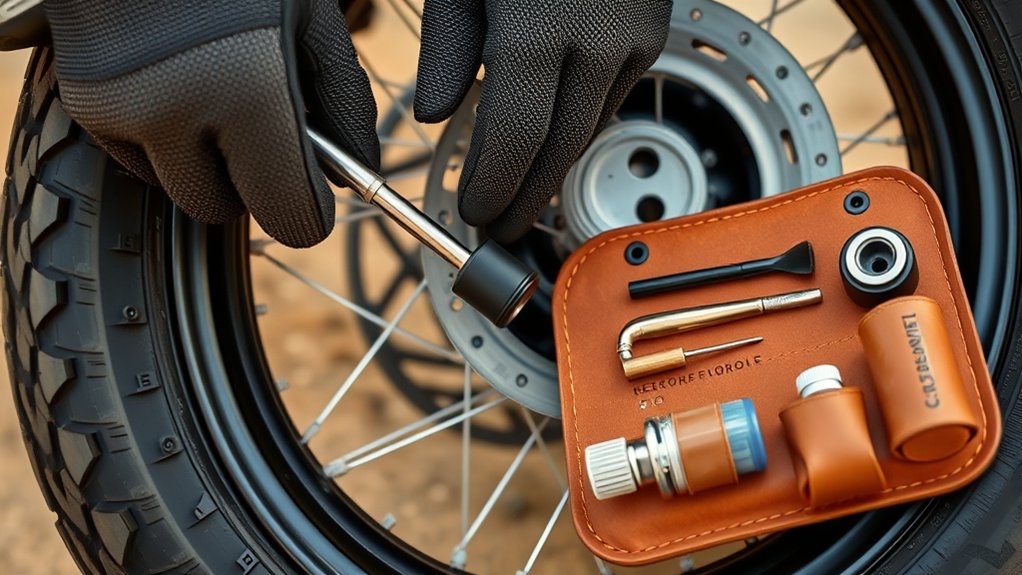
A basic motorcycle tire plug kit gives you the core tools to get back on the road.
It usually includes several rubber plugs, a T-bar rasp, a T-bar plug inserter, and a small tube of rubber sealant.
You’ll also want pliers and a sharp knife or snips to remove debris.
After inserting the plug, trim it flush so it sits about 1/8 inch above the tread.
Trim the plug flush, leaving it about 1/8 inch above the tread.
Before insertion, fold or wad the plug into the inserter’s jaws.
Then coat it with sealant so it seals the puncture.
Use the rasp to clean and slightly widen the puncture.
This helps the plug seat correctly.
Keep a 12V portable air compressor with the kit.
After the repair, reinflate the tire and ride to a shop.
Find the Leak and Confirm It’s Repairable
Start by locating the leak in the tread area.
Use a visual check, a careful listen for hissing, or soapy water to spot bubbles at the puncture.
Once you’ve found it, confirm the damage sits in the tread, not the sidewall or shoulder.
Those areas aren’t safely repairable with a plug.
Measure the opening.
A plug works only for small punctures, usually up to about 1/4 inch.
If it’s larger than your kit can handle, get a mechanic’s inspection.
Next, check that a single foreign object caused the leak.
If there are multiple cuts or hidden damage, don’t assume it’s repairable.
Also look for bulges, exposed cords, or very shallow tread.
If you see any of these, skip the repair.
A temporary plug only makes sense when the tire’s structure is intact.
Remove the Nail or Screw Safely

Once you’ve confirmed the puncture, mark the spot and remove the nail or screw with care.
Wear gloves and eye protection, and keep the tire steady on the bike or clamped off it.
Grip the fastener’s head with locking pliers or needle-nose pliers, then pull straight out in one controlled motion.
Don’t twist it. Sideways movement can enlarge the hole and compromise the repair.
If the object sits deep or resists removal, stop and reassess rather than forcing it.
As soon as it’s out, inspect the puncture immediately.
Check whether the opening is within your plug kit’s limits and whether it’s in the tread, not the sidewall.
If the damage is too large or in an unsafe location, skip the plug and arrange professional repair or tire replacement.
Ream the Hole for a Better Plug Fit
Use the T-bar rasp from your plug kit to ream the puncture, keeping it in the tread area only. Insert the rasp straight into the hole, then work it in and out several times, twisting as needed.
Use the T-bar rasp to ream the puncture in the tread area only, working it in and out carefully.
This helps clean the channel and remove loose rubber, dirt, and any remaining debris. You want the opening to feel smooth and just large enough for the plug to pass through snugly, without forcing it.
Don’t over-ream. A hole that’s too big can weaken the seal and reduce repair reliability.
Keep the tool moving freely, but stay controlled and precise. If the damage is in the sidewall, stop, because plug repairs aren’t safe there.
When you finish, wipe away any residue and get the plug ready immediately so the puncture stays clean and open.
Insert the Motorcycle Tire Plug

Thread the strip-style plug through the clamp end of the T-bar inserter. Make sure the sticky rubber section sits centered and both ends are held firmly.
Align the tool with the puncture, then drive it straight in. Stop when about 1/8 to 1/4 inch of plug stays above the tread. Keep the motion controlled so the plug enters without folding or scraping.
Twist the inserter slightly, then pull it back out in one smooth motion. The clamp should release the plug and leave it seated in the hole.
Finish by trimming the exposed material flush to about 1/8 inch above the tread.
- Centered plug in the inserter
- Straight insertion into the puncture
- Clean trim after tool removal
Reinflate the Motorcycle Tire and Check for Leaks
Attach a 12V portable compressor to the valve stem and inflate the tire to the manufacturer’s recommended PSI.
Run the compressor while the bike is idling or while it’s connected to a running vehicle battery so you don’t drain the battery.
Then, apply soapy water or a tire leak detector around the plug area and the valve stem.
Watch for steady bubbles—if you see them, that confirms there’s still a leak.
Once you’re confident it’s sealed, go ahead and trim the plug (if needed) and recheck the pressure after a short ride.
Reinflate With Compressor
Now reinflate the tire by connecting a 12V portable compressor to the valve stem. Bring the pressure up to the manufacturer’s recommended spec, usually about 30–40 psi for many motorcycles. Check the bike’s placard or owner’s manual for the exact value.
Keep the engine running, or use a battery support, so the compressor doesn’t drag voltage down and lose output. Watch the gauge closely and stop at the target pressure. Let the tire settle a moment before checking again.
Spray soapy water around the plug and valve stem. Look for bubbles that show an active leak path.
Hold pressure for several minutes and confirm it stays stable. If pressure falls more than a few psi in 10–15 minutes, don’t ride. Repair it properly first.
Check Valve And Plug
Reconnect the 12V portable compressor to the valve stem.
Inflate the motorcycle tire to the pressure listed on the sidewall or in the owner’s manual.
Make sure the valve core is tight and undamaged.
Replace it if you removed it or notice any seepage.
Once you reach the correct pressure, apply soapy water or tire sealant to the plug site and valve stem.
Watch for bubbles that indicate escaping air.
Then run the motorcycle briefly, or rotate the wheel if it’s off the bike.
Inspect the plug and valve again.
After 10–15 minutes, recheck the pressure to confirm it’s holding.
If you lose more than a few psi, or see bubbles at the plug or valve, don’t ride far.
Reinflate as needed and arrange a professional repair immediately.
Inspect For Air Leaks
Reinflate the tire to the manufacturer’s recommended pressure, usually about 30–40 psi on many motorcycles. Use a 12V compressor or a gauge-equipped pump.
At the correct pressure, spray soapy water or a tire-leak detector around the puncture and valve stem. Watch closely for bubbles, since bubbles mean air is still escaping.
If you removed a nail or screw, inspect the hole with the rasp and by eye. Holes over 6 mm, or ragged tears, won’t seal reliably and need professional repair.
Check the plug seat and surrounding tread. Recheck the valve core for seepage.
Ride 1–2 miles slowly, then measure pressure again. If pressure drops more than a few psi within an hour, or bubbling continues, pull the tire and have it patched or replaced professionally.
Get a Professional Inspection After Plugging
Treat the plug like a temporary repair.
Then, have the tire inspected by a professional within 24–48 hours.
When you take it in, ask the technician to demount the tire and check the tread, the inner liner, and the belt area for any hidden damage, leaks, or poor plug sealing.
If they spot any damage or recommend replacing the tire, follow that advice before you ride again.
Temporary Fix Only
A tire plug is a temporary roadside repair, not a permanent fix.
Ride cautiously to the nearest professional shop and have the tire inspected as soon as possible.
Keep your speed down and avoid heavy loads.
Don’t plan long rides until a technician signs off.
The plug only seals the puncture from the outside.
It doesn’t restore full structural strength, and a shop can judge whether you need an internal patch/plug or a full replacement.
- Ride straight to the nearest repair facility.
- Treat the tire as limited-use until inspected.
- Replace the tire if the damage exceeds the kit’s limits.
A trained technician should remove the tire, inspect it from the inside, and confirm it’s safe for continued service.
Inspect For Hidden Damage
After you’ve ridden the motorcycle to safety with a temporary plug, have the tire inspected by a professional within 24–48 hours.
You need an internal inspection because a plug can’t reveal hidden cuts, bead separation, or damaged belt cords.
A technician should dismount the tire, check the inside for ply separation or sidewall weakness, and perform a leak-down test to confirm the repair holds.
If the puncture is in the sidewall or exceeds about 1/4 inch (6 mm), the tire isn’t repairable and should be replaced.
A proper shop repair uses an inside combination plug/patch to restore structure, not an external roadside plug alone.
If you notice rapid pressure loss, bulging, vibration, or exposed cord, stop riding immediately and get the tire inspected.
Visit A Shop Soon
Ride slowly and go straight to a shop within 25–50 km (15–30 miles) after plugging the tire.
Have a technician verify the repair and tyre integrity.
A plug is only a temporary fix.
You can’t fully judge the inner liner or puncture path while the tire stays mounted.
Ask the shop to remove the tire and inspect the damage from inside.
They can install a proper internal patch or a patch-and-plug combo, which is the accepted permanent tread repair.
Check whether the puncture sits near the sidewall.
Confirm the hole isn’t larger than the kit limit.
Have them inspect balance, valves, and wheel torque.
If they find tread wear, sidewall damage, or exposed cords, expect a replacement recommendation.
Frequently Asked Questions
How Do I Know if the Tire Damage Is Too Large to Repair?
You know the damage is too large to repair if the puncture exceeds about 1/4 inch.
It also isn’t repairable if it sits on the sidewall or shoulder, or has jagged, torn edges.
If you see multiple holes, exposed cords, bulges, or bubbles, the tire isn’t safe to plug.
A clean nail hole in the tread can be repairable, but impact damage or rapid air loss means you should replace the tire, not patch it.
Can I Plug a Motorcycle Tire Without Removing the Wheel?
Yes, you can plug a motorcycle tire without removing the wheel if the puncture is in the tread and you can reach the object.
You’ll use a T-bar rasp to clean the hole, insert a rubber plug with a T-bar tool, and trim it flush.
Don’t plug sidewall or shoulder damage.
Reinflate with a 12V compressor, then check for leaks with soapy water before riding to a shop.
How Long Should a Motorcycle Tire Plug Last Safely?
You should treat a motorcycle tire plug as a short-term fix.
It’s usually only meant to get you to a repair shop, typically a few miles or, at most, a few days.
Sometimes you can ride hundreds of miles on a puncture with good tread.
But don’t count on it.
Check the tire pressure often, and avoid high speed.
Then replace or have the tire professionally repaired as soon as possible.
Should I Use a Plug Patch or a Simple String Plug?
You should use a plug patch if you want the safest, most durable repair. It seals the puncture channel and the inner liner, making it better for a motorcycle tire’s long-term use.
Use a simple string plug only as a temporary roadside fix. It doesn’t bond to the liner, so it isn’t ideal for permanent riding.
If the hole is in the sidewall or exceeds limits, replace the tire.
What Should I Avoid Doing Immediately After Plugging the Tire?
You should avoid speed, heat, and load right away. Don’t hit the highway or ride fast, and don’t carry a passenger. The plug can overheat and fail under stress.
Skip long trips and treat the repair like a limp to the shop, not a permanent fix. Also, don’t assume sidewall or large damage is safe.
Check the pressure immediately, then again after a few miles to confirm it’s holding air.
Conclusion
With the hole plugged, your tire can hold air again.
But don’t coast on confidence—check the repair like a pilot checks a preflight gauge.
Reinflate the tire, spray for leaks, and watch the pressure.
A plug is a field patch, not a permanent crown, so ride carefully.
Schedule a pro inspection soon.
When you treat the tire like a pressurized vessel, not a lucky charm, you keep your bike rolling safely and steadily.