How To Use A Motorcycle Jack – Quick Guide
Choose a jack rated 25–50% above your bike’s wet weight.
Use a low-profile or hydraulic model that fits your ground clearance.
Park on level concrete, and keep the bike in gear.
Center the saddle under a reinforced frame point, never the engine case.
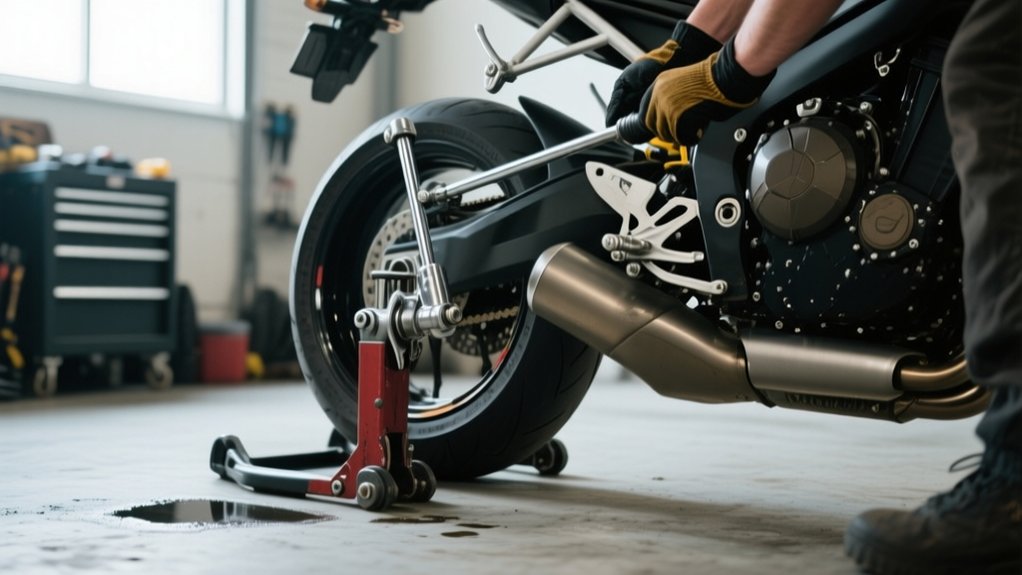
Raise it slowly in short strokes, then lock it with straps and rated stands before working.
Lower it just as carefully, and the next steps will make the process even safer.
Choose the Right Motorcycle Jack
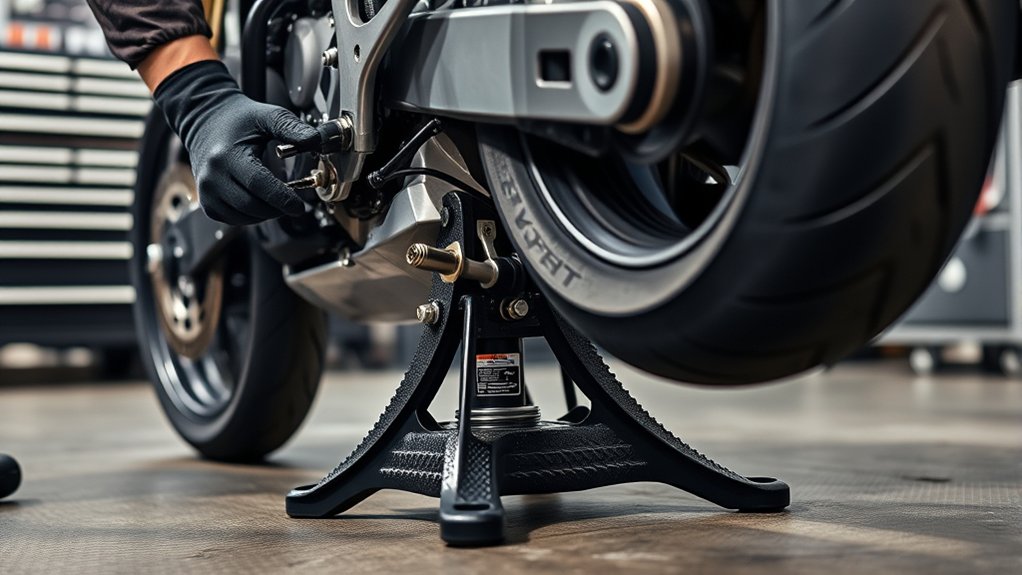
Start by matching the jack to your bike’s design and weight.
Start with a jack matched to your bike’s design and weight for safe, stable lifting.
Low-profile scissor or trolley jacks suit cruisers and sportbikes with about 3–4 in (75–100 mm) of ground clearance.
Vertical bottle or hydraulic lifts are better for higher-clearance bikes and shop use.
Next, check the load rating.
Choose a jack rated 25–50% above your bike’s dry weight.
For a 500 lb bike, pick 750–1000 lb capacity.
Make sure the saddle accepts a compatible adapter or padded cradle.
It should support reinforced points, not casings.
Look for wide bases, locking mechanisms, swivel casters, and rubberized pads to reduce slip and lateral movement.
Finally, confirm the jack fits under the bike.
It should clear exhaust and fairings and store easily in a dry, rust-resistant form.
Check front and rear balance before lifting.
Find Safe Lifting Points
You should place the jack on the motorcycle’s reinforced frame lift points—typically the lower frame tubes or the center-stand pivot crosspiece.
I’d avoid supporting the bike on the engine casing unless the service manual specifically allows it as a limited lift point.
Also, be sure to check the manual and use a jack adapter that matches the bike’s frame geometry and the load rating.
Frame Lift Points
Precision matters when choosing frame lift points. The jack must support the motorcycle only at reinforced, structural locations. Avoid soft or non-structural parts.
Target welded frame tubes, the lower cross-member, or other factory-designed contact points meant to carry load. Check your model’s service manual for the exact jack pad location.
Look for any notes about front-wheel removal or special supports. Center the jack under the confirmed point on level ground.
Raise it slowly and watch for full contact and stable balance. If the saddle doesn’t fit, use an adapter or jig that spans the two lower frame tubes.
Make sure the frame, not a soft component, takes the load. Keep secondary stands or blocks in place before you work underneath.
Avoid Engine Casing
Even with the right frame lift point, don’t place the jack pad under the engine casing or side covers. Those aluminum or cast parts can crack, deform, or shear mounting bolts when you load them with the bike’s full weight.
Check your service manual for the exact jack points first. Some manuals show a small reinforced pad on the underside of the engine, but that’s only for brief, low-pressure support during tasks like front wheel removal.
For stable lifting, use factory frame points such as lower center-stand tubes or reinforced cross members. If your adapter won’t reach safely, use a jig that spans both lower frame tubes and spreads the load across welded sections.
Always lower the bike onto jack stands before working.
Set the Bike on Level Ground

Set the motorcycle on a flat, hard surface like concrete or asphalt. Avoid gravel, grass, or any slope that could let the jack or bike shift.
Set the motorcycle on a flat, hard surface like concrete or asphalt. Avoid gravel, grass, or any slope.
Put the transmission in gear and leave the side or center stand down while you prepare. This helps prevent the bike from rolling unexpectedly.
Verify the surface is truly level. If you have a bubble level, check under the bike, or compare the floor to a nearby fixed reference.
Clear 2–3 feet around the motorcycle so nothing blocks your footing or jack movement. Remove loose debris, tools, and parts from the work area.
Look up and confirm there’s enough overhead clearance. Include garage doors or shelving so you can raise the bike safely without contact.
Position the Jack Under the Frame
Check your manual for the recommended jacking point, then position the jack saddle directly under the reinforced frame contact point (or an approved center-stand mount).
If possible, use a wide, padded saddle or the right adapter so the load spreads across the lift pad without crushing any thin tubing.
Raise the jack slowly, and keep an eye on the contact point as you lift to make sure everything stays flush and stable.
Frame Contact Points
Position the jack saddle under the motorcycle’s reinforced lower frame tubes or center-stand mounting points.
These factory-designed areas are meant to carry the bike’s weight.
You’ll often find the best jack point on the lower crossmember just behind the engine.
Or use the boxed section where the center stand bolts on.
Check your factory manual for the exact location and load limit before you lift.
This helps you avoid unsafe lifting points.
Keep the jack centered beneath the frame.
That reduces the chance of slipping.
Use a rubber pad or adapter on round tubes.
It improves grip and helps prevent damage.
Watch for any frame flex as you raise it.
If you notice movement, stop and adjust.
Never place the saddle under the oil pan, engine casing, footpeg bracket, radiator, or fairing mount.
Those parts aren’t structural, and they can crack or bend.
Lift slowly on level ground.
Stabilize the bike with the bars or a tie-down.
Lift Pad Placement
Place the jack pad under the reinforced center frame or designated jacking point shown in the factory manual. It’s usually a boxed section or crossmember near the engine.
Never set it under oil pans or thin casings. Match the pad to the frame tube spacing so it bears on reinforced members, not bodywork.
Center it longitudinally near the bike’s center of gravity. Place it just behind the engine midpoint for even lift.
| Check | Action | Result |
|---|---|---|
| Pad fit | Match tube diameter | Less slip |
| Pad position | Center under frame | Even lift |
| Contact points | Use lower tubes | Strong support |
| Clearance | Move loose parts | No interference |
| Test lift | Apply slight pressure | Stable contact |
Before lifting fully, verify the kickstand, passenger pegs, and accessories are clear. Confirm the bike doesn’t tip side to side.
Raise the Motorcycle Slowly

With the jack pad centered under the manufacturer-recommended lift point and the release closed, pump slowly. Let the pad make solid contact before you add load.
With the jack pad centered under the lift point, pump slowly and let it seat before adding load.
Use short, controlled strokes and pause every 1–2 inches. This helps you verify the bike stays vertical and the pad stays aligned.
Most service jacks rise about 1–2 inches per pump, so don’t rush past the height you need. Watch closely for shifting, creaking, or any gap opening between the pad and lift point.
If you see movement, lower the jack, reposition, and start again. Lift only enough to remove the wheel or set stands.
Check alignment at each pause. Stop immediately if the bike moves unexpectedly.
Stabilize the Bike With Tie-Downs
Before you lift, place the bike on a level, non-slip surface. Then warm the suspension briefly, shut the bike off, and set it in neutral.
Next, secure two high-quality ratchet straps to solid frame points, ideally at about 45° front and rear. Tighten them evenly so the bike can’t tip or shift.
After you lift it a few inches, pause and recheck every anchor point, the strap tension, and how well the steering is restrained before you raise it higher.
Secure Tie-Down Setup
Secure the motorcycle with ratchet straps from sturdy frame points, not fairings. Tighten each strap until the bike stands vertical, without preloading the suspension.
Attach the straps to two opposite anchor points on the trailer or lift. Add a third strap over the bars or through the fork tubes to a forward anchor.
Add a fourth strap from the rear subframe to a rear anchor. Use soft loops or edge protectors on painted areas, and ratchet in short, alternating pulls to keep tension even.
Set each strap at about 45° when possible. Choose straps rated for 1,500–3,000 lb working load.
Bounce the bike gently, then re-tension and recheck fasteners.
Prevent Bike Movement
Once the motorcycle is strapped to the jack, prevent shifting by running two ratchet straps from strong points on the handlebars or frame down to solid anchors on the lift.
Use one strap per side in a crisscross or opposing pair to resist fore-aft and side-to-side movement.
Add soft pads where webbing contacts paint.
Don’t loop straps around cables or thin plastic.
Tighten until the bike feels firm, but avoid compressing the suspension.
| Check | Action |
|---|---|
| Stability | Rock the bike gently |
| Movement | Retighten if needed |
| Support | Engage jack lock |
| Backup | Use a paddock stand |
For storage or long jobs, add blocks or axle stands.
Then recheck strap tension as temperatures change.
Verify Stability Before Starting Work
To keep the bike stable, set it on level, solid ground like concrete. Make sure the jack’s base sits flat so it can’t tip or sink.
Center the jack under a factory-approved lift point. This helps the load rise straight and stay balanced front to rear.
Before you pump, lock the bike against roll or lean. Use chocks or straps to a fixed anchor.
Lift slowly and watch for any shift in the frame or stand. When the bike reaches working height, add rated supports right away.
Do not rely on the hydraulic jack alone.
- Check the floor for slope, cracks, or debris.
- Confirm the jack contacts the frame squarely.
- Set stands in place before you start work.
Know the Safe Weight Limit
With the bike stabilized, confirm the jack can actually carry the load. Check the rating on the label or in the manual.
Many motorcycle jacks support 500 lb, while heavy-duty units handle 1,000 to 1,500 lb. Compare that number to your bike’s wet weight from the owner’s manual, including fuel, oil, and fluids.
Make sure the total stays below the jack’s limit. If you’re lifting only the rear or front, use the single-wheel or swing-arm rating, not the full-bike rating.
Choose a jack rated 25 to 50% above the motorcycle’s wet weight to cover movement, tools, and shifting loads. Don’t rely on the jack alone for extended work.
Use rated stands or blocks and follow the jack’s lift-height and load-point instructions.
Lower the Motorcycle Carefully
Before lowering the bike, make sure the ground is level.
Ensure rated jack stands or blocks are set under the frame or center-stand points in case the jack slips.
Keep the motorcycle in gear.
If you can, have a helper steady the bars and rear wheel.
Release the jack slowly, a few millimeters per second.
Control the handle and keep one hand on the bike.
Watch for any shift in balance.
Stop if parts touch the exhaust, fairings, or engine casings.
Reposition supports before continuing.
Once the wheels touch down, remove the jack.
Check that the bike sits squarely on its wheels or stand.
Clear every tool, block, and fastener before you walk away.
Avoid Common Jacking Mistakes
Even a small jacking error can crack parts or tip the bike.
Place the jack only under the reinforced frame or the manufacturer’s specified lift point. Do not place it on the engine casing.
Center the jack so both sides make solid contact.
Chock the wheels, then leave the bike in gear or set the parking brake before you lift.
Raise the jack slowly and stop at first contact to check balance. Watch for tilt and reposition before going higher.
If you use an adapter or puck, make sure it bears on frame members. Do not let it rest on thin sheet metal.
Once the bike’s up, lock it with stands or blocks rated for more than the motorcycle’s weight. Don’t trust the jack alone for service work or long pauses.
Frequently Asked Questions
Can I Use a Motorcycle Jack on a Bike With Fairings?
Yes, you can use a motorcycle jack on a bike with fairings.
Just position it carefully and lift only on the frame, engine cradle, or designated lift points.
Do not lift on the fairings.
Use rubber pads or adapters to help prevent cracking or damage to the plastic.
Check clearance first before you start lifting.
Then raise the bike slowly and confirm it stays stable as you go.
If the fairings block access to the correct lift points, remove them.
Or use a stand designed specifically for your bike model.
Do I Need a Front and Rear Stand Together?
No, you don’t always need both. About 70% of routine maintenance can be done with just a rear stand.
But you’ll want front and rear support when you remove wheels, service forks, or need maximum stability.
Use one stand for chain work, cleaning, and storage.
Add the front stand if you’re lifting the front end or loosening steering components.
How Do I Know if My Garage Floor Is Strong Enough?
Check your garage floor for cracks, spalling, or movement.
If you can, verify the slab thickness.
A typical 4-inch concrete slab on a compacted base usually handles a motorcycle jack.
Still, confirm the load rating if the floor is old or damaged.
Place the jack only on level concrete.
Never set it on asphalt or pavers.
If you’re unsure, distribute the load with a steel plate or move to a stronger surface.
Can I Leave the Motorcycle on the Jack Overnight?
Yes, you can leave your motorcycle on the jack overnight if it’s raised correctly and the jack stays stable. Still, don’t treat it like a permanent setup forever.
Think of it like a temporary bridge: safe when it’s supported, risky when it’s neglected. Use the jack on level concrete and keep the bike centered.
For extra safety, add straps or secondary stands as backup. Before leaving it, double-check lock engagement, pressure points, and clearance.
What Maintenance Should I Do Before Lifting the Bike?
Check tire pressure, inspect for leaks, and clean the frame, swingarm, and jack points before you lift.
Confirm the engine is cool, remove loose luggage, and disconnect any accessories that could snag.
Verify the jack pads and contact points are clean and centered.
Lubricate pivot points if needed.
Finally, check chain slack and brake condition.
This way, you don’t miss any existing issues once the bike is elevated.
Conclusion
In the end, using a motorcycle jack safely comes down to control and preparation.
Choose the right jack, place it on level ground, and lift only at approved support points.
Keep the bike within the jack’s weight rating.
Always check stability before you work.
Lower it slowly when you’re done.
A steady hand keeps the machine upright, and prevention is worth a pound of repair.