
How To Balance A Motorcycle Tire – Quick Guide
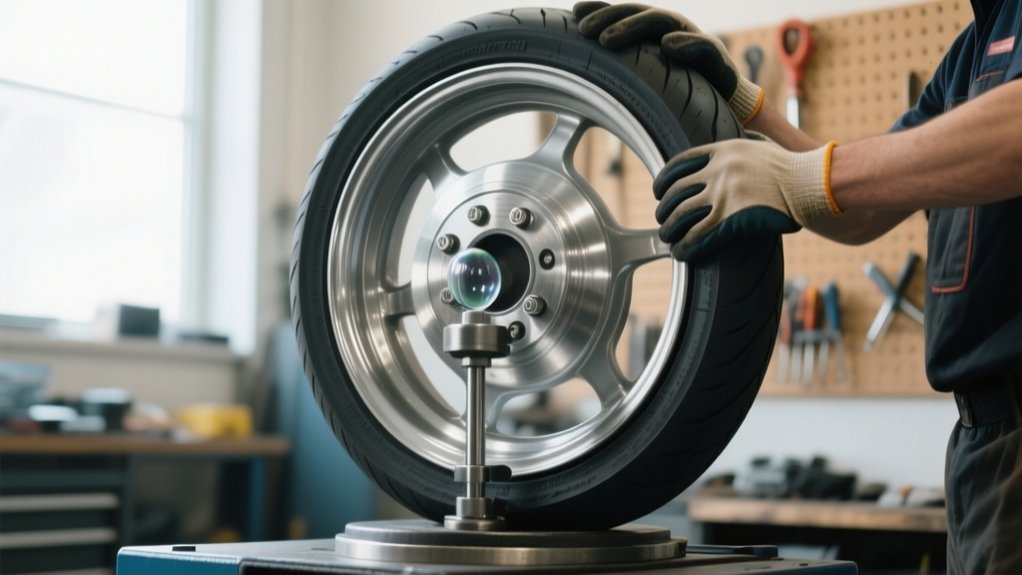
To balance a motorcycle tire, remove the wheel, clean the rim, and mount it on a low-friction balancer with the correct hub adapters so it spins freely.
Let it settle to find the heavy spot, then add small 2–5 g weights opposite that mark.
Recheck by spinning and releasing at several positions until the wheel stays still.
If vibration persists or the wheel is wide, you may need dynamic balancing for a more precise fix.
How to Balance a Motorcycle Tire at Home
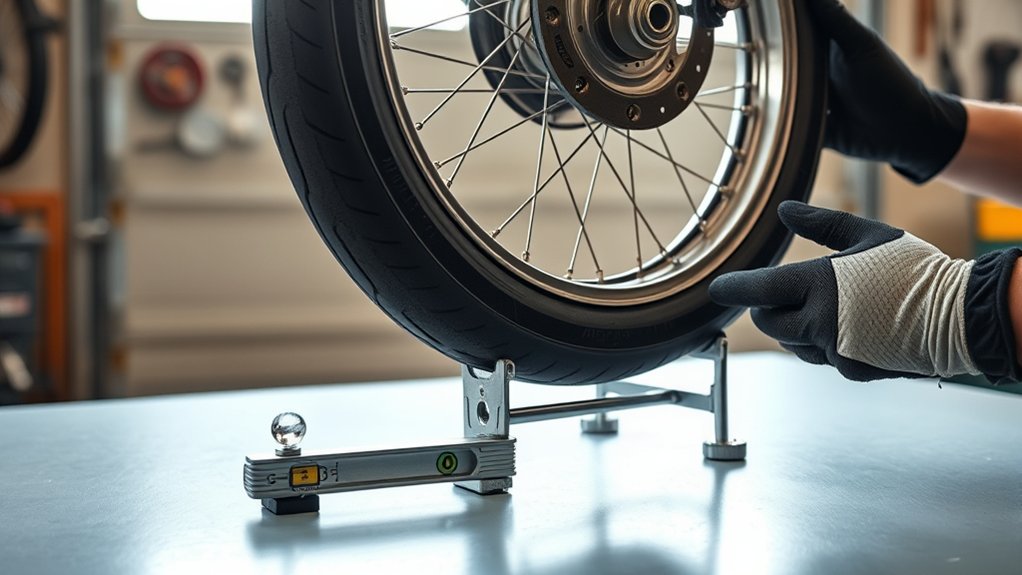
At home, remove the wheel and clean the rim.
Mount it centered on a low-friction static balancer using the correct hub adapters or cones, so it spins freely.
Mount the wheel centered on a low-friction balancer with the proper cones so it spins freely.
Spin the wheel slowly and let it settle.
Mark the light spot at 12 o’clock with tape.
Rotate the wheel 90 degrees to confirm the mark repeats.
Add small adhesive weights opposite the mark, using temporary tape during trials.
Keep adding weights until the wheel no longer rolls back to the same position.
Use crimp-on weights for spoked wheels and rim-edge adhesive weights for cast wheels, never on the tire itself.
Recheck the balance, then reinstall the wheel.
Torque the fasteners to spec and test ride for smoothness.
Why an Unbalanced Motorcycle Tire Matters
Even a small imbalance creates an uneven mass distribution around the wheel’s rotation axis. You’ll usually feel it as a buzz through the handlebars around 50–70 mph.
That vibration means your unbalanced wheels are loading the chassis unevenly. Over time, the tire, wheel bearings, suspension parts, and fasteners wear faster.
This raises maintenance costs and can reduce safety. Because a motorcycle has single-track stability, even slight imbalance hurts handling and rider confidence.
Static balancing helps you find a heavy spot when the wheel keeps settling to the same position on a low-friction balancer. Don’t ignore rear-wheel issues either, since its greater mass can hide or amplify vibration.
Check both wheels when highway shake shows up.
Static vs Dynamic Balancing

Static balancing handles a wheel’s imbalance in one plane, so it’s the method you’ll use for most street motorcycles and typical front wheels. You check for the light spot, then place weight opposite it until the wheel stays put.
Static balancing is quick, cheap, and usually enough after every tire change or every 4,000–6,000 miles. If you still feel vibration at speed, especially on wider rear rims, step up to dynamic balancing.
A spin balancer measures imbalance in two planes, so you can correct both side-to-side and up-and-down forces. Shops use dynamic balancing when careful static work doesn’t cure highway shake.
For routine maintenance, start with static balancing, then use dynamic balancing only when the wheel still won’t run smoothly.
Tools You Need to Balance a Motorcycle Tire
To balance a motorcycle tire accurately, you’ll need a low-friction static wheel balancer.
A low-friction static wheel balancer is essential for accurately balancing a motorcycle tire.
You’ll also need hub adapters or centering cones sized to your axle.
For weights, have adhesive stick-on options for cast rims.
For spoked wheels, use crimp-on weights.
A motorcycle wheel balancer with stainless bearings can give smoother readings.
Hub adapters keep the wheel centered during setup.
Keep these essentials ready:
Isopropyl cleaner and a rag for removing old adhesive.
Use masking tape and a marker to mark reference points.
Have weight-removal pliers or a trim tool for repositioning weights.
A torque wrench helps with correct reassembly torque.
Use small weight increments, typically 2–5 g, so you can tune precisely.
If you service tires often, choose a quality balancer.
Make sure it supports multiple hub sizes.
Find the Heavy Spot on the Wheel

With the wheel mounted on the low-friction balancer, spin it slowly and let it settle.
The heavy spot will keep rotating to the bottom.
Watch the wheel on the balancer and mark that point with tape or a grease pencil.
Then you can find it again later.
Turn the wheel 90° and release it.
If the same spot drops back down, it’s a true static heavy spot.
On many wheels, the valve stem sits near the heavy spot.
Don’t assume it’s always there.
Keep the spin test repeatable by letting it settle fully each time.
This tells you where correction is needed before you place any weight.
Add Weight to the Light Side
Place the weight on the light side of the wheel, directly opposite the heavy spot on the rim edge. Don’t place it on the tire.
Use small stick-on weights, about 2–5 grams. Tape them temporarily so you can change the setup quickly.
On cast wheels, clean and degrease the rim before applying adhesive weights. On spoked wheels, use crimp-on sinker weights clipped to the rim or spokes.
Identify the light spot by where the wheel rises. Then add weight in small increments.
Spin the wheel and let it settle. Keep adding weight until it stays put.
When the wheel no longer returns to 12 o’clock, leave the weight on the rim edge. Press it firmly into place.
Recheck and Fine-Tune the Balance
Spin the wheel again and let it settle. If the same spot keeps landing at 12 o’clock, you’re still a bit heavy on that side.
Now shift the weight in small increments. After each adjustment, check what happens at the 3 and 9 o’clock positions until the wheel stays motionless when it’s at rest.
When it’s balanced, clean the area and secure the final weights in place. Then re-spin the wheel once more to confirm everything holds steady.
Spin And Recheck
After adding a trial weight, spin the wheel and let it settle.
Check whether the same spot keeps returning to the bottom.
If it does, that shows the heavy spot.
Then fine-tune by moving weight opposite it.
Watch each wheel spin cycle closely.
Mark the repeatable spot before adding weight.
Recheck at 90° by releasing from 3 and 9 o’clock.
Then add or remove 1–5 g and repeat.
You want a wheel that stays where you place it.
It shouldn’t drift back.
Clean the rim before each change.
Press weights firmly and keep testing.
Keep going until no position repeats.
Finally, spin the wheel again to confirm stable balance at multiple orientations.
Then reinstall the wheel.
Adjust Weight Placement
Now fine-tune the weight placement based on what the wheel tells you.
Add a small wheel weight, 5–10 g, then spin and watch where it settles.
If the same light spot returns to 12 o’clock, move the trial weights opposite it in 2–5 g steps.
Use the 90° check to verify balance. Stop the wheel at 3 o’clock, release, and see whether it stays put.
Repeat at 270°.
| Check | Action | Result |
|---|---|---|
| 12 o’clock | Add weight | Light spot shifts |
| 90° check | Release wheel | Holds position |
| 270° check | Recheck | No drift |
For spoked wheels, crimp-on weights work the same way.
Keep adjusting in small increments, and don’t jump to large changes.
Confirm Final Balance
Recheck the wheel by rotating it 90° and releasing it.
If it stays put at the 3 and 9 o’clock positions, your static balance is correct.
Give the wheel a gentle spin and let it settle several times.
It should return to the same heavy spot only once.
If it doesn’t, move weights in 1–5 g steps until the wheel is properly balanced.
Clean the rim with degreaser or IPA before final adhesive placement.
Press the weights firmly and let the adhesive cure as directed.
Remount the wheel, then torque axles and pinch bolts to spec.
Test-ride at the vibration speed to confirm the buzz is gone.
If vibration remains, check runout, worn bearings, and damaged rims.
Also check uneven tire seating and dynamic imbalance.
Common Motorcycle Tire Balancing Mistakes
Even a careful balancing job can go wrong if you skip the basics. Clean the rim first so old adhesive, grease, and brake dust don’t interfere with stick-on weights or distort the reading.
Use a low-friction, well-centered balancer. A sticky stand or poor centering creates false heavy-spot data and throws off balancing.
Don’t add too much weight at once. Apply small increments opposite the marked heavy spot, then spin again and check at 3 and 9 o’clock until the wheel stays put.
If the axle, chain, caliper, or pinch bolts bind the wheel, remove it and correct the setup first. Quitting after one spin leaves uneven weight unresolved.
Repeat the spin-and-adjust cycle until the tire remains motionless before finalizing the weight.
When to Choose a Dynamic Balance
If a correct static balance still leaves vibration, it may be time for a dynamic balance.
You should choose dynamic balancing when the rear wheel still shakes after setup, especially on wide rims or heavy cast wheels.
It measures imbalance in two planes, so a shop can place weights on the inner and outer rim faces.
Choose dynamic balancing if vibration continues across a wide speed range.
You also may need it if you feel lateral wobble, not just a vertical hop.
When static balancing keeps failing, it’s a strong sign to switch.
It can also help if uneven tire wear or runout and stiff spots persist.
Dynamic machines spin the mounted wheel and show magnitude and phase.
That helps correct couple forces more precisely.
It costs a bit more, but it can help protect tires, bearings, and suspension from extra wear.
Frequently Asked Questions
How Often Should Motorcycle Tires Be Balanced?
You should balance your motorcycle tires whenever you mount or replace them.
Then, recheck them every 4,000–6,000 miles.
You should rebalance sooner if you hit a pothole or curb.
You should also do it if you feel vibration at cruising speed or notice uneven tread wear.
If you remove a wheel for service, verify balance before reinstalling it.
Heavier loads and long-distance riding can shift balance faster, so check more often.
Can Old Wheel Weights Be Reused?
Yes, you can reuse some old wheel weights.
But only if they’re clean, rust-free, and still grip tightly.
About 1 in 3 reused adhesive weights fails after removal because the glue weakens.
So don’t trust the old backing.
Check clip-on weights for cracks, bends, or missing metal.
Then verify their mass with a small scale.
If they’re deformed or corroded, replace them.
New weights cost little and balance more reliably.
Do New Tires Always Need Balancing?
No, but you should usually balance new tires after mounting.
Even brand-new tires and rims can have uneven mass, which you’ll feel as vibration.
You can fix most setups with static balancing on a stand.
Then place weights opposite the heavy spot.
Check the tire’s DOT, the valve stem, and bead seating.
If you still get a highway buzz, you may need dynamic balancing or tire re-seating.
Can Tire Sealant Affect Balance?
Yes, tire sealant can affect balance because you’re adding moving mass inside the tire.
If you use a small amount, you probably won’t notice much on most street bikes.
Larger amounts can shift and pool, which may cause vibration at certain speeds.
After sealing, rotate the wheel slowly, then recheck static balance.
You may need to add or move weights.
Dried sealant can also create persistent imbalance.
Is Balancing Different for Tubeless Tires?
No, you balance tubeless tires the same way, but the details differ.
You mount the wheel on a static or dynamic balancer, find the heavy spot, and add weight opposite it.
On tubeless setups, you usually use stick-on weights on clean rim surfaces. You can also use balancing beads.
If the tire has a dot, align it with the valve or rim heavy spot to reduce correction.
Conclusion
Balancing your motorcycle tire doesn’t have to be guesswork.
When you find the heavy spot, add the right weight, and recheck.
That way, you smooth out vibration and protect your bike’s handling.
I once watched a rider swap a shaky 70 mph buzz for a steady, calm ride after a simple static balance.
It was proof that small fixes matter.
Take your time, use the right tools, and you’ll ride safer, longer, and with more control.