How To Measure Motorcycle Tires – Complete Guide
To measure a motorcycle tire, read the full sidewall code. Then verify width, aspect ratio, rim diameter, construction, load index, speed rating, and DOT date.
Match those specs to your owner’s manual, not just the width. Check the tire’s max PSI, but use the bike’s recommended cold pressure.
Inspect wear bars, directional arrows, and balance marks before mounting. If you want a safe replacement, the next steps matter even more.
How to Read Motorcycle Tire Size

Start by reading the metric size on the sidewall, such as 180/55ZR17.
180 is the tire width in millimeters, 55 is the aspect ratio, ZR indicates a high-speed radial construction, and 17 is the rim diameter in inches. You can use this motorcycle tire size to match the tire to your wheel and to understand its profile.
After the size, check the load and speed ratings, such as 77H.
These ratings tell you the maximum carrying capacity and the safe top speed. Read the load index and speed symbol exactly as stamped.
Also note construction codes like R for radial or B for bias-ply.
These codes affect fit and handling. Choose replacements with equal or higher ratings than your manual specifies.
Finally, verify any manufacturer-specific code charts before ordering.
Measure Width, Aspect Ratio, and Rim Diameter
Read the metric tire code on the sidewall to identify the three dimensions that matter most: width, aspect ratio, and rim diameter.
On a code like 180/55ZR17, the first number, 180, gives the nominal section width in millimeters from sidewall to sidewall.
The second number, 55, is the aspect ratio.
It tells you the sidewall height equals 55% of the width, or 99 mm here.
The last number, 17, gives the rim diameter in inches.
So the tire fits a 17-inch wheel.
If your tire size uses inches, convert the width and rim diameter directly, like 5.00-16.
For alphanumeric codes, check the chart for the matching mm and inch values.
Always confirm the full marking and your owner’s manual before you buy.
Decode Radial vs Bias Ply Markings
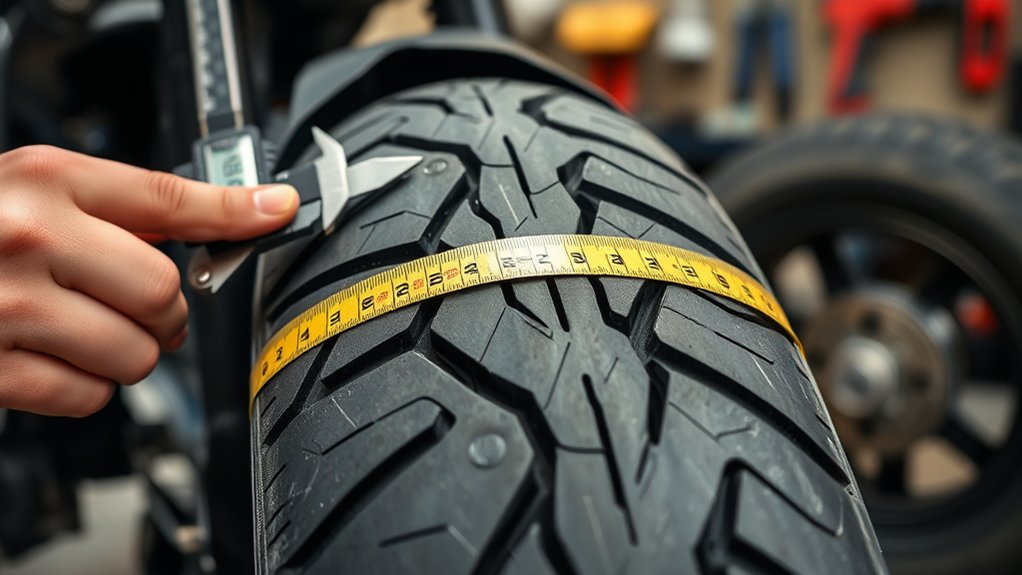
When you read a tire size like 120/70R17, the “R” tells you it’s radial—that means the steel belts run across the carcass, so the tread and sidewall can flex more independently.
On the other hand, if you see a “B” or there’s no explicit “R”, you’re usually looking at bias-ply construction. In that design, the plies run diagonally, which typically gives you a stiffer sidewall and better load support.
Either way, it’s smart to match the tire construction to your motorcycle’s design and the manufacturer’s specifications, because mixing radial and bias tires can affect handling and load limits.
Radial Markings Explained
| Marking | Meaning |
|---|---|
| R | Radial |
| B | Bias-ply |
| No letter | Verify spec |
| Steel belts | Radial tread support |
| Match type | Keep handling consistent |
If the sidewall omits R, confirm the type in the manual or manufacturer spec.
When you replace tires, match the original construction front and rear.
Mixing constructions can upset handling and stability.
Bias Ply Markings
Bias-ply markings tell you whether a tire uses overlapping plies instead of radial belts. They’re usually easy to spot on the sidewall.
You’ll typically see a B in alphanumeric codes like MU85B16. Or you may see no R at all in inch sizing such as 5.00-16, which indicates bias ply construction. Use this quick check:
- Read the size code first.
- Look for R to confirm radial, or B or none to indicate bias ply.
- Verify the tire matches your bike’s manual before you fit it.
Bias-ply tires flex as a unit, so they can change handling, load-carrying, and wheel compatibility. If the sidewall doesn’t explicitly say radial, treat it as bias ply and confirm the OEM spec before you buy.
Check Load Index and Speed Rating
Check the load index and speed rating on the sidewall before you buy or mount a tire. These numbers tell you whether it can safely carry your motorcycle’s weight and handle its top speed.
The load index, such as 77, shows the maximum load per tire. Confirm both tires can support the bike, rider, passenger, and luggage at full weight.
The speed rating, such as H, V, or W, shows the highest sustained speed the tire can handle at that load. Always check your owner’s manual for the minimum load index and speed rating, and never go below them.
If you change tire sizes, verify the paired markings still meet the bike’s requirements. Under-rated tires can overheat, fail, and reduce control.
Read Maximum PSI on the Sidewall

Check the tire sidewall for the stamped “MAX PRESSURE” or “MAX LOAD … AT (PSI)” marking—usually located near the DOT code.
That number is the tire’s structural maximum, not the recommended operating pressure, and it can range from about 36 PSI to 50+ PSI depending on the tire.
Never inflate above that limit.
Instead, use your motorcycle’s specified cold tire pressure for normal setup and day-to-day maintenance.
Sidewall PSI Markings
Read the tire sidewall for its maximum safe inflation pressure, such as “Max Pressure 50 PSI,” and use that number as the tire’s structural limit, not necessarily the pressure you should run.
You’ll also find your motorcycle’s recommended PSI in the owner’s manual or on a placard. It may be lower to support better handling and tire wear.
Check pressure cold with a calibrated gauge, since both values assume no heat buildup from riding.
- Use the tire sidewall marking to avoid overinflation.
- Follow the manufacturer’s recommended PSI for load or passenger use.
- Match pressure to the bike, not just the Max Pressure number.
If you exceed the printed limit, you can reduce traction, increase uneven wear, and raise failure risk.
Maximum Pressure Limits
The maximum PSI printed on your tire’s sidewall is the tire’s structural pressure limit. It isn’t necessarily the pressure you should run.
Treat markings like Max Pressure 50 PSI as an absolute cap for tire pressure. That number often goes with the tire’s maximum load rating, which indicates the inflation level at which the load applies.
You should never exceed it. Overinflation can reduce traction, cause uneven wear, and raise failure risk.
For your riding setup, follow your motorcycle owner’s manual or the tire placard. Recommended pressure is usually lower than the sidewall max.
Check cold tire pressure with a calibrated gauge before riding. Then adjust to the specified operating PSI while staying safely below the printed maximum.
Spot DOT Codes and Date Marks
Once you know where to look, you can spot the DOT marking on the tire sidewall and decode its date stamp quickly. The code starts with “DOT,” followed by manufacturer and plant identifiers and a tire size code, then ends with the last four digits that show the manufacture date.
Read that DOT code carefully. The date mark tells you the week and year the tire was made. For example, 1523 means the 15th week of 2023.
- Check the last four digits only for age verification.
- Ignore paint dots or mold codes. They’re factory identifiers.
- Replace tires that are 5–10 years old, even if they look serviceable.
Older tires may use a three-digit mark. Modern tires use four digits for traceability and safety.
Use Wear Bars to Check Tread Depth
Next, check the wear bars to verify tread depth.
Use a flashlight to inspect the tread grooves around the tire.
Wear bars (also called tread wear bars or TWI) are raised rubber strips molded into the main circumferential grooves.
On many motorcycle tires, small triangles or TWI letters on the sidewall mark where they are.
When the tread surface sits level with a wear bar, the tire has reached its legal minimum tread depth and needs replacement.
Limits vary by jurisdiction, but in the U.S. this usually means about 1/32 inch (0.8 mm), and sometimes 2/32 inch (1.6 mm).
Check several points around the tire.
If one groove is flush, replace the tire.
Replace early if you see uneven wear, cracking, or damage.
Identify Directional Arrows and Balance Marks
Check the tire sidewall for the directional arrow. This arrow shows the correct rotation for forward motion, so it needs to match the wheel’s spin when you mount the tire.
Then, look for the balance mark—usually a paint dot or a small triangle—and align it with the wheel’s heaviest point, often near the valve stem, to help reduce static imbalance.
If you spot multiple marks or the symbols are unclear, don’t guess. Instead, follow the manufacturer’s instructions before you install the tire.
Directional Arrow Meaning
A directional arrow stamped on the sidewall shows which way the tire must rotate forward. This lets the tread shed water and deliver the traction it was designed for.
When you mount the tire, read the directional arrow on the tire sidewall. Match it to forward rotation on the bike. If you install it backward, you can lose wet grip, add uneven wear, and risk warranty or ECE/DOT issues.
- Check the arrow before inflation, not after.
- Point the arrow toward the front of the motorcycle when the wheel is installed.
- If you also see a balance mark, keep it aligned during installation.
Use the arrow as your primary orientation cue. Confirm both front and rear tires follow the same forward direction.
Balance Mark Purpose
Balance marks help you line up the tire’s lightest point with the wheel’s heaviest point. This usually means lining it up with the valve stem to reduce static imbalance during mounting.
Check the balance mark. It may appear as a paint dab, dot, or raised symbol.
Pair it with any directional arrows molded into the sidewall. The arrow must point forward when the wheel rolls in normal travel.
If the tire has both identifiers, satisfy both requirements. Orient the directional arrows first, then place the balance mark near the valve stem or the wheel’s specified heavy spot.
Some brands use different colors or symbols for a light spot or runout. Read the mounting guide first, since it will tell you what each mark means.
Correct placement lowers vibration. It also promotes even wear and preserves the designed wet-road handling.
Installation Alignment Tips
Once you’ve identified the tire’s balance mark, line up the tire for installation. Match the raised directional arrow on the sidewall to the wheel’s forward rotation, so the tread sheds water as designed.
When you mount the tire, place the painted balance mark at the wheel’s light spot, usually the valve stem. This helps reduce added weights.
If you see both yellow and red dots, use the yellow dot first. It indicates better radial uniformity.
Confirm left/right or inner/outer bead orientation before inflation. Then torque the axle nut to spec to prevent wobble.
- Align arrow to travel.
- Match balance mark to valve stem.
- Recheck balance, then test ride and re-torque after 50–100 miles.
Match Tire Size to Your Motorcycle Manual
Your owner’s manual is the starting point for any tire replacement. It lists the exact sizes the manufacturer tested for handling and clearance, such as 120/70R17 front and 180/55ZR17 rear. Use that tire size as your baseline, then confirm the load index and speed rating, like 58W or 77H. This helps ensure the replacement can safely carry your bike, rider, passenger, and luggage.
If your manual gives an alternate wheel and tire setup, follow that configuration’s sizing and inflation specs exactly. Match radial, bias-ply, or bias-belted construction when the manual specifies it. Don’t mix types front to rear.
After installation, verify PSI and check clearance. If you changed rim diameter or the sizing format, confirm steering geometry and speedometer accuracy.
Avoid Common Motorcycle Tire Sizing Mistakes
Even if a tire looks close, you need to verify the full sidewall code. Match the motorcycle’s load index and speed rating to or above the owner’s manual, because a lower rating can lead to structural failure or unsafe handling. Read the complete tire size, not just the width, such as 180/55ZR17, which tells you section width, aspect ratio, and rim diameter.
- Use a conversion chart for MU85B16 or 5.00-16, or you may alter the contact patch and cause rim interference.
- Don’t swap radial for bias-ply unless the bike’s suspension and frame geometry support it, since flex characteristics differ.
- Check sidewall PSI, then set operating pressure to the manufacturer’s spec, not the maximum printed value, to control wear and handling.
Frequently Asked Questions
How Often Should Motorcycle Tires Be Replaced?
You should replace motorcycle tires when the tread is worn, sidewalls crack, or the tires reach about five years old, even if the tread looks fine.
You also need new tires after punctures, uneven wear, or when grip feels reduced in wet or cold conditions.
Check tire pressure and wear monthly, and inspect them before every long ride.
If you ride aggressively or daily, you’ll likely replace tires sooner since heat and abrasion speed up deterioration.
Can Different Tire Brands Be Mixed Safely?
You can mix tire brands only if you match size, load rating, speed rating, and intended use.
However, it isn’t ideal.
You’ll get the safest handling when you use a matched front and rear set.
Different tread compounds and profiles can change steering, grip, and braking balance.
If you must mix brands, check your owner’s manual.
Then have a qualified technician inspect fitment, clearance, and compatibility before you ride.
Do Motorcycle Tire Pressures Change With Temperature?
Yes. Your motorcycle tire pressure rises as temperature increases and drops as it cools.
If you check pressure after riding, you’ll read a higher value because heat expands the air.
You should measure cold tires, ideally before riding, and adjust to the manufacturer’s specification.
Don’t bleed off hot pressure unless the manual says so.
Watch the thermometer and your gauge, because a few degrees can affect handling, grip, and wear.
Should New Tires Be Broken in Before Riding Hard?
Yes, you should break in new tires before riding hard. You’ll get the best grip after the release agents wear off and the surface scuffs in.
Ride smoothly for the first 50 to 100 miles. Avoid full lean angles, abrupt braking, and hard acceleration.
Check the pressure first, then do heat cycles and monitor tread condition. After that, gradually increase your pace as the contact patch settles in.
Can Tire Sealant Affect Motorcycle Tire Performance?
Yes, tire sealant can affect your motorcycle tire’s performance.
If you overuse it, you may add weight and upset balance.
It can also slightly change handling, like a hidden drag on the road.
Follow the tire and sealant maker’s limits.
Some products can interfere with TPMS sensors or damage carcass materials.
Use only the recommended amount and inspect for leaks.
And remember, sealant is a repair aid, not a substitute for proper maintenance.
Conclusion
You’ve learned how to measure motorcycle tires with precision, but the real value is in matching numbers to real-world fit and safety.
A tire can look right yet be wrong. Even a small mismatch can affect handling, clearance, and load capacity.
Read the sidewall, check your manual, and verify tread, pressure, and direction before you ride.
When you measure carefully, you avoid guesswork. And when you avoid guesswork, you protect both performance and control.